React MUI底部导航
React Material UI 是一个用于实现Google Material Design的React用户界面组件的开源库。它提供了一系列预先构建、可复用、响应式的组件,需要较少的编码工作,并且可立即用于生产实施。它包括精美设计的组件,可以根据用户的需求轻松定制。
底部导航 是一种展示主要和经常访问的页面或目标的方法。开发者可以使用Material UI提供的底部导航组件在屏幕底部显示三到五个经常访问的页面或目标。每个导航可以用一个图标和可选的文本表示。当用户点击任何底部导航,在关联的目标页面上显示相应的图标。
语法:
<BottomNavigation>
    <BottomNavigationAction label="" icon={ } />
</BottomNavigation>
重要的属性:
- children: 它用来为组件提供内容。
- classes: 它用于覆盖组件的样式。
- component: 它用于设置根节点。可以是HTML字符串或组件。
- onChange: 它用于处理用户单击底部导航选项时的事件。
- showLables: 它用于允许BottomNavigationAction组件显示导航选项的文本标签。
- value: 它用于保存当前选定的底部导航选项。
设置React.js应用程序:
步骤1: 使用以下命令创建一个React.js应用程序:
npx create-react-app foldername
步骤2: 在创建完项目文件夹(例如 foldername)之后,使用以下命令进入该目录:
cd foldername
步骤3: 创建 ReactJS 应用程序后,使用以下命令安装所需的模块:
npm install @mui/material @emotion/react @emotion/styled
npm install @mui/icons-material
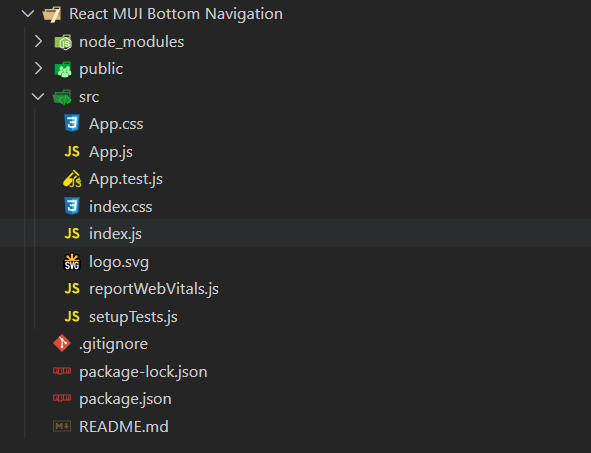
项目结构: 项目的结构将会如下所示:
示例1: 在这个示例中,我们使用了BottomNavigation组件。我们从Material UI中导入图标,以将文本和图标都表示为导航选项。BottomNavigation组件的“onChange”属性上的函数负责处理变化事件,而对于导航选项或目标页面,我们使用了带有“label”和“icon”属性的“BottomNavigationAction”。
- App.js: 在App.js文件中写入下面的代码,其中App是React提供的默认组件,代码在其中编写。
import React, { useState, useEffect } from "react";
import BottomNavigation from
    "@mui/material/BottomNavigation";
import BottomNavigationAction from
    "@mui/material/BottomNavigationAction";
import AttachEmailOutlinedIcon from
    '@mui/icons-material/AttachEmailOutlined';
import CloudDownloadOutlinedIcon from
    '@mui/icons-material/CloudDownloadOutlined';
import BookmarksOutlinedIcon from
    '@mui/icons-material/BookmarksOutlined';
import DeleteOutlineOutlinedIcon from '
    @mui/icons-material/DeleteOutlineOutlined';

const App = () => {
    const [value, setValue] = React.useState(0);

    return (
        <div style={{ textAlign: "center", marginTop: "50px" }}>
            <h1>Geeks for Geeks</h1>
            <h3>Bottom Navigation Component</h3>
            <BottomNavigation
                showLabels
                value={value}
                onChange={(event, newValue) => {
                    setValue(newValue);
                }}
            >
                <BottomNavigationAction label="Email"
                    icon={<AttachEmailOutlinedIcon />} />
                <BottomNavigationAction label="Download"
                    icon={<CloudDownloadOutlinedIcon />} />
                <BottomNavigationAction label="Bookmarked"
                    icon={<BookmarksOutlinedIcon />} />
                <BottomNavigationAction label="Deleted"
                    icon={<DeleteOutlineOutlinedIcon />} />
            </BottomNavigation>
        </div>
    );
};

export default App;
运行程序的步骤: 从项目的根目录中执行以下命令来运行应用程序:
npm start
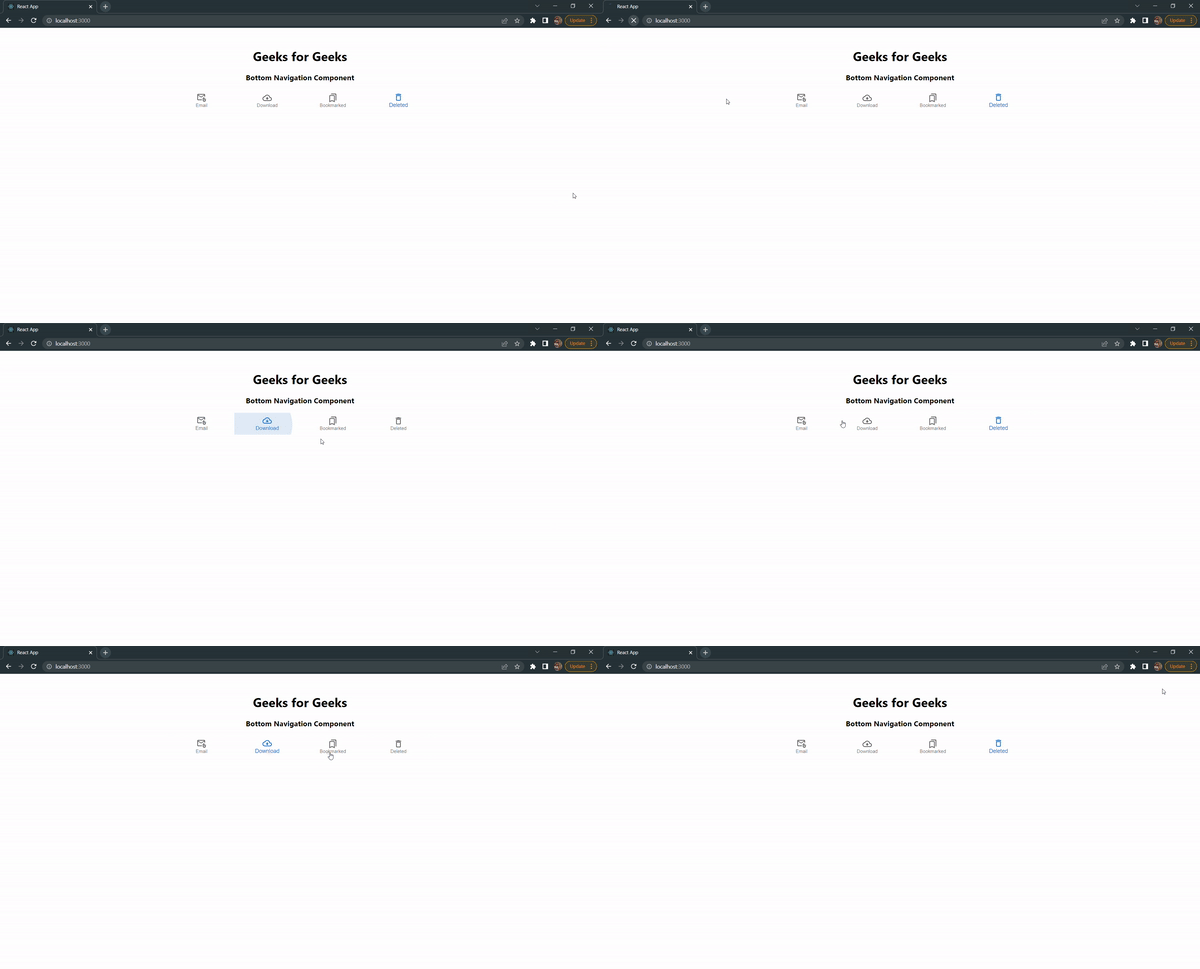
输出:
你的网络应用程序将在“http://localhost:3000”上运行。现在,你将看到以下输出:

示例2: 在这个示例中,我们使用了CustomBottomNavigation组件来实现相同的功能。在这个示例中,我们将”BottomNavigationAction”组件作为子元素传递给我们自定义的导航组件。
- App.js: 在App.js文件中写下以下代码,其中App是React提供的默认组件,用于编写代码。
import React, { useState, useEffect } from "react";
import BottomNavigation from "@mui/material/BottomNavigation";
import BottomNavigationAction from
    "@mui/material/BottomNavigationAction";

import TwitterIcon from '@mui/icons-material/Twitter';
import InstagramIcon from '@mui/icons-material/Instagram';
import FacebookIcon from '@mui/icons-material/Facebook';
import TimelineIcon from '@mui/icons-material/Timeline';

const App = () => {
    const [value, setValue] = React.useState(0);

    const CustomBottomNavigation = (props) => {
        return (<BottomNavigation
            showLabels
            value={value}
            onChange={(event, newValue) => {
                setValue(newValue);
            }}
        >
            {props.children}
        </BottomNavigation>
        );
    }

    return (
        <div style={{ textAlign: "center", marginTop: "50px" }}>
            <h1>Geeks for Geeks</h1>
            <h3>Bottom Navigation Component</h3>
            <CustomBottomNavigation >
                <BottomNavigationAction label="Twitter"
                    icon={<TwitterIcon />} />
                <BottomNavigationAction label="Instagram"
                    icon={<InstagramIcon />} />
                <BottomNavigationAction label="Facebook"
                    icon={<FacebookIcon />} />
                <BottomNavigationAction label="Timeline"
                    icon={<TimelineIcon />} />
            </CustomBottomNavigation>
        </div>
    );
};

export default App;
运行程序的步骤: 要运行应用程序,请从项目的根目录执行以下命令:
npm start
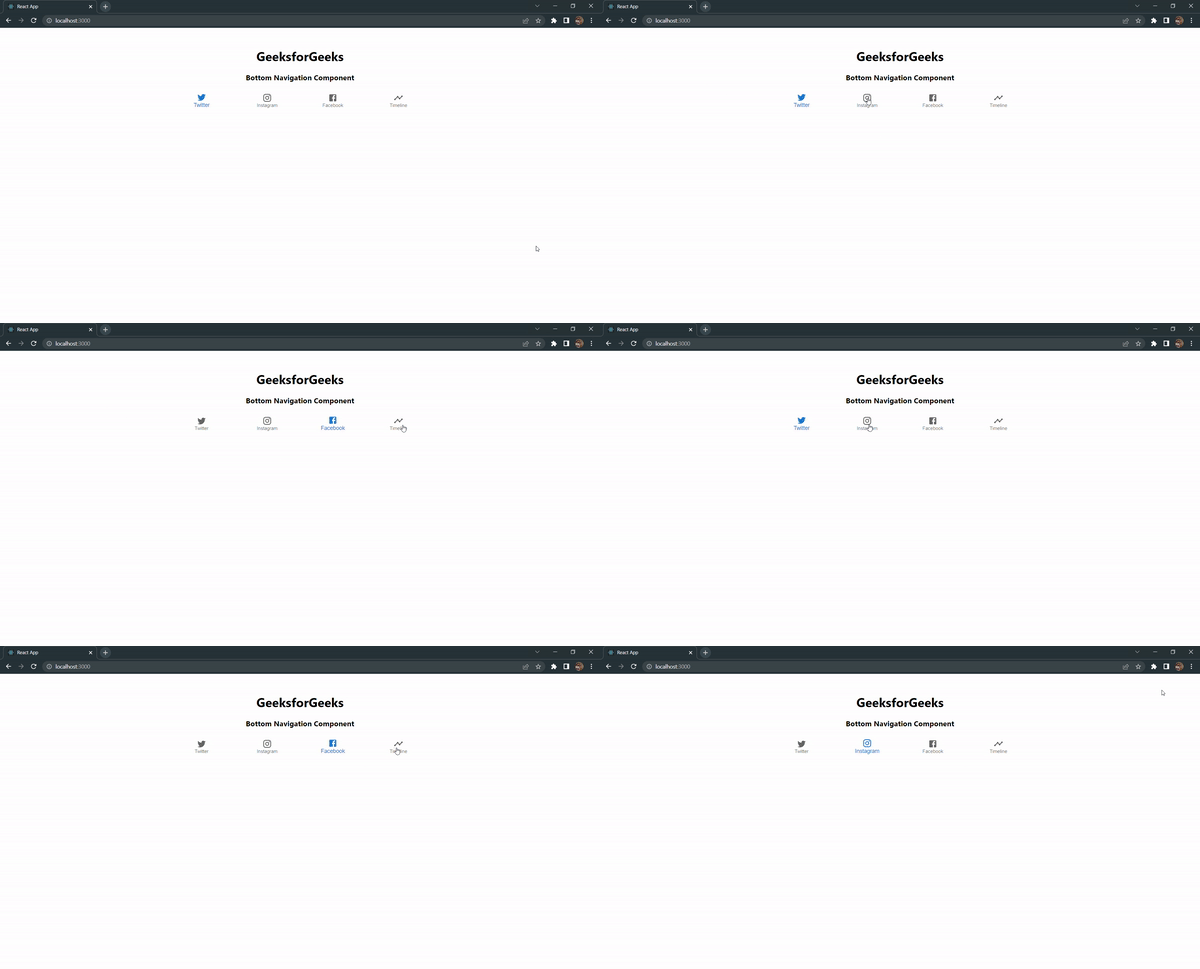
输出: 你的Web应用将在“http://localhost:3000”上启动。现在,你将看到以下输出:

参考: https://mui.com/material-ui/react-bottom-navigation/
 极客教程
极客教程