React MUI 网格布局
React MUI 是一个 UI 库,提供了功能丰富的组件,将我们自己的设计系统应用于我们的生产就绪组件。MUI 是一个用户界面库,提供了预定义和可定制的 React 组件,用于更快、更轻松的网页开发,这些 Material-UI 组件基于 Google 的 Material Design。
在本文中,我们将讨论 React MUI 网格布局。响应式布局网格适应屏幕大小和方向,确保布局的一致性。
网格布局变体:
- 流体网格: 这种网格类型使用可缩放和调整大小的列来放置内容,并可以使用断点来确定是否需要大幅度更改布局。
- 间距: 间距的值可以是任何正数,包括小数和字符串。
- 响应式值: 网格布局支持所有响应式值,如列、列间距、方向、行间距和间距。
- 交互式: 要使网格布局交互式,可以使用 directions、justifyContent 和 alignItems 属性。
- 自动布局: 自动布局使项均匀地共享可用空间,并且可以设置一个项的宽度,其他项将自动围绕它调整大小。
- 复杂网格: 借助网格布局,可以创建复杂的布局。
- 嵌套网格: container 和 item 属性是两个独立的布尔值,可以结合使用,使 Grid 组件既是一个 flex 容器,又是一个作为嵌套网格的子组件。
- 列: 我们可以使用 columns 属性来更改默认的列数(12)。
- 限制: 网格布局有一些限制,如负边距、white-space: nowrap、direction: column | column-reverse。
- CSS 网格布局: 网格布局在内部使用了 CSS flexbox,但我们也可以使用系统和 CSS 网格来布局页面。
- 系统属性: 网格布局支持所有系统属性,并且可以直接用作组件的属性。
- API: 在容器布局中使用的 API 是:
<Grid />
语法:
<Grid>
    ...
</Grid>
创建React项目:
步骤1: 要创建一个React应用程序,请通过npm命令安装React模块。
npm create-react-app project name
步骤2: 在创建React项目之后,进入文件夹执行不同的操作。
cd project name
步骤3: 在创建ReactJS应用程序之后,使用以下命令安装所需的模块:
npm install @mui/material @emotion/react @emotion/styled
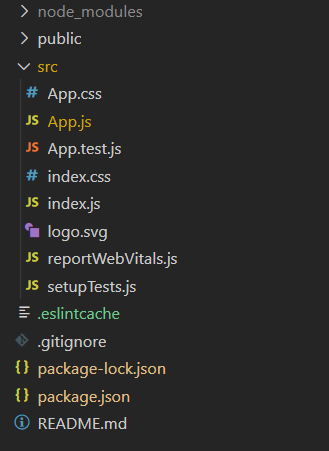
项目结构:

运行应用程序的步骤: 打开终端并输入以下命令。
npm start
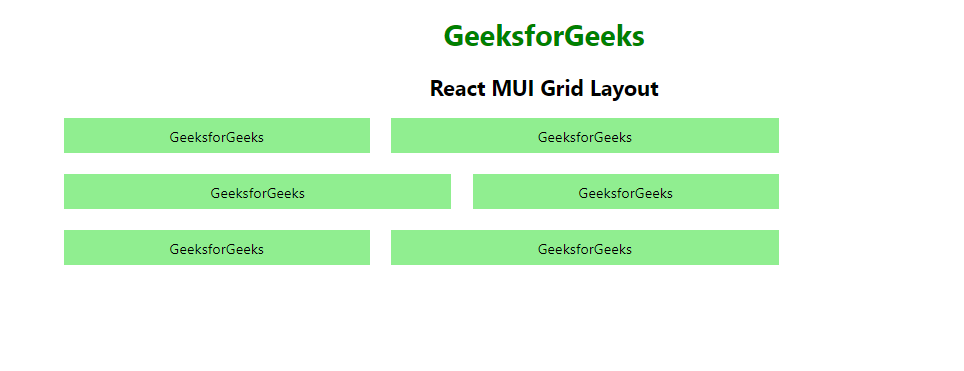
示例1: 下面的示例演示了React MUI流体网格布局。
import {
    Grid,
} from "@mui/material";
import { Box } from "@mui/system";
import * as React from "react";

function App() {
    return (
        <center>
            <div>
                <h1 style={{ color: "green" }}>GeeksforGeeks</h1>
                <h2>React MUI Grid Layout</h2>
            </div>
            <div style={{ width: "50%" }}>
                <Grid container spacing={3}>
                    <Grid item xs={4}>
                        <Box sx={{ backgroundColor: 'lightgreen',
                            padding: 1, textAlign: 'center', }}>
                            GeeksforGeeks
                        </Box>
                    </Grid>
                    <Grid item xs={5}>
                        <Box sx={{ backgroundColor: 'lightgreen',
                            padding: 1, textAlign: 'center', }}>
                            GeeksforGeeks
                        </Box>
                    </Grid>
                    <Grid item xs={5}>
                        <Box sx={{ backgroundColor: 'lightgreen',
                            padding: 1, textAlign: 'center', }}>
                            GeeksforGeeks
                        </Box>
                    </Grid>
                    <Grid item xs={4}>
                        <Box sx={{ backgroundColor: 'lightgreen',
                            padding: 1, textAlign: 'center', }}>
                            GeeksforGeeks
                        </Box>
                    </Grid>
                    <Grid item xs={4}>
                        <Box sx={{ backgroundColor: 'lightgreen',
                            padding: 1, textAlign: 'center', }}>
                            GeeksforGeeks
                        </Box>
                    </Grid>
                    <Grid item xs={5}>
                        <Box sx={{ backgroundColor: 'lightgreen',
                            padding: 1, textAlign: 'center', }}>
                            GeeksforGeeks
                        </Box>
                    </Grid>
                </Grid>
            </div>
        </center>
    );
}

export default App;
输出:

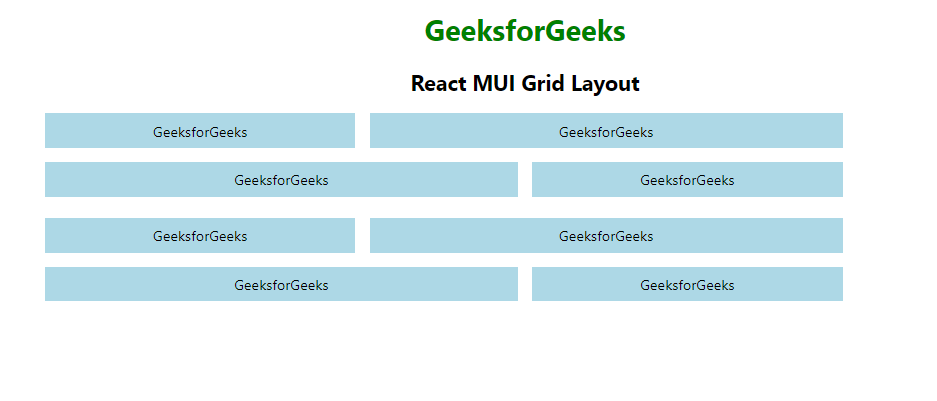
示例2: 下面的示例演示了React MUI嵌套网格布局。
import {
    Grid,
} from "@mui/material";
import { Box } from "@mui/system";
import * as React from "react";

function GridComponent() {
    return (
        <React.Fragment>
            <Grid item xs={4}>
                <Box sx={{ backgroundColor: 'lightblue',
                    padding: 1, textAlign: 'center', }}>
                    GeeksforGeeks
                </Box>
            </Grid>
            <Grid item xs={6}>
                <Box sx={{ backgroundColor: 'lightblue',
                    padding: 1, textAlign: 'center', }}>
                    GeeksforGeeks
                </Box>
            </Grid>
            <Grid item xs={6}>
                <Box sx={{ backgroundColor: 'lightblue',
                    padding: 1, textAlign: 'center', }}>
                    GeeksforGeeks
                </Box>
            </Grid>
            <Grid item xs={4}>
                <Box sx={{ backgroundColor: 'lightblue',
                    padding: 1, textAlign: 'center', }}>
                    GeeksforGeeks
                </Box>
            </Grid>
        </React.Fragment>
    )
}

function App() {
    return (
        <center>
            <div>
                <h1 style={{ color: "green" }}>
                    GeeksforGeeks
                </h1>
                <h2>React MUI Grid Layout</h2>
            </div>
            <div style={{ width: "50%" }}>
                <Grid container spacing={3}>
                    <Grid container item spacing={2}>
                        <GridComponent />
                    </Grid>
                    <Grid container item spacing={2}>
                        <GridComponent />
                    </Grid>
                </Grid>
            </div>
        </center>
    );
}

export default App;
输出:

参考链接: https://mui.com/material-ui/react-grid
 极客教程
极客教程