如何为HOC组件创建 Props 代理
在本文中,我们将学习如何为HOC(高阶组件)函数创建Props代理。基本上,它允许我们在渲染之前向包装的组件添加props。它在日志记录、修改传递给组件的数据以及处理任何类型应用程序的身份验证方面被使用。
先决条件
- ReactJs介绍
- ReactJs中的高阶组件
- 在ReactJs中传递props
创建React应用的步骤
步骤1: 使用以下命令创建一个React应用。
npx create-react-app foldername
步骤2: 在创建项目文件夹(即文件夹名称)后,使用以下命令切换到该文件夹。
cd foldername
项目结构

方法
- 我们正在创建一个名为“WithPropsProxy”的组件,该组件接受props并将该prop作为一个具有由“WithPropsProxy”组件创建的props和newProps的组件返回。
- 我们正在创建一个功能组件“MyComponent”,该组件接受props并将这些props作为HTML元素返回。
- 这是主文件’App.js’,在屏幕上呈现所有内容。
- 我们导入了上面创建的两个组件。
- 我们将MyComponent作为一个prop传递给WithPropsProxy组件,并将其存储在一个常量变量’WrappedComponent’中。
- 然后,我们通过传递一些props将该“WrappedComponent”组件渲染出来。
示例: 创建一个组件,以便我们可以将其传递给另一个函数组件,并了解在HOC组件中如何使用props代理。
//WithPropsProxy.js

import React from 'react';

const WithPropsProxy = (WrappedComponent) => {
    return function (props) {
        const newProps = {
            Name: 'High order component',
            Topic: 'ReactJs',
            Level: 'easy'
        };
        return <WrappedComponent {...props}
            {...newProps} />;
    };
};
export default WithPropsProxy;
//MyComponent.js

import React from 'react';
const MyComponent = (props) => {
    return (
        <div>
            <p>{props.Name}</p>
            <p>{props.Topic}</p>
            <p>{props.Level}</p>
            <p>{props.otherProp}</p>
        </div>
    );
};

export default MyComponent;
//App.js

import './App.css';
import WithPropsProxy from './WithPropsProxy';
import MyComponent from './MyComponent';

// Wrap your component here
const WrappedComponent = WithPropsProxy(MyComponent);
function App() {
    return (
        <div className="center">
            <h3>
                How to create props proxy for HOC component?
            </h3>
            <WrappedComponent otherProp="GeekForGeeks" />
        </div>
    );
}
export default App;
运行应用程序的步骤:
npm start
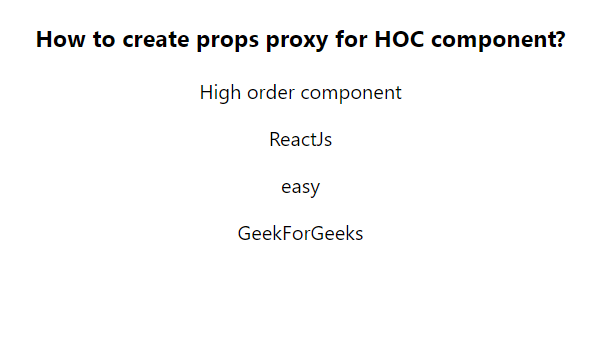
输出:

 极客教程
极客教程