Next.js 构建贷款计算器
贷款计算器允许用户确定贷款金额、利率和期限,计算每月按揭付款、期限内的总贷款付款以及总利息支付金额。在本文中,我们将为您详细介绍使用Next.js构建贷款计算器的过程。
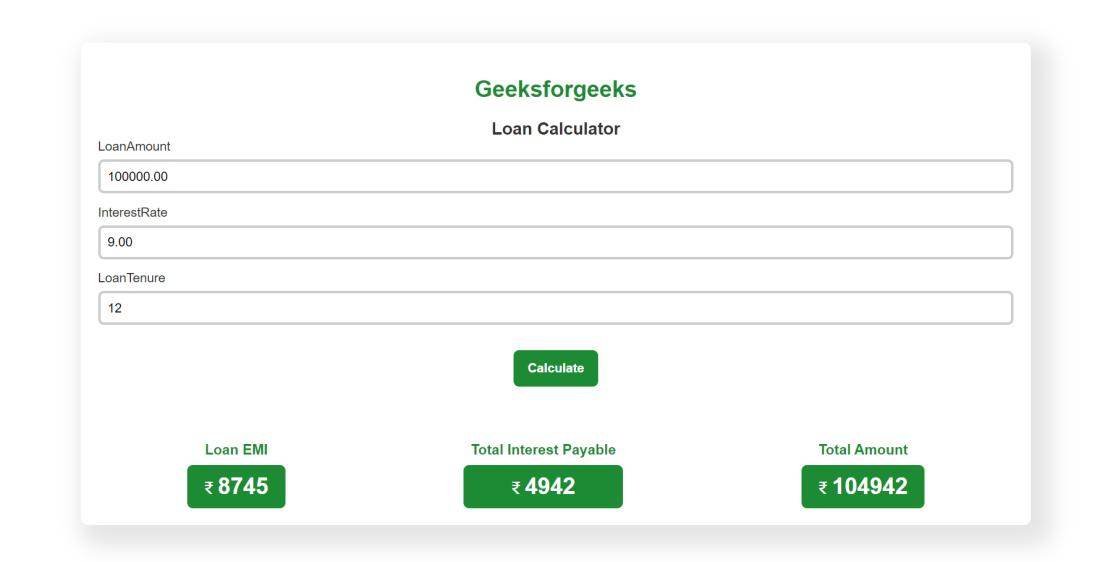
现在我们来看一下我们完成的项目的样子:

使用的技术/先决条件
- Next入门
- Next组件
- React Hooks
- NPM或NPX
方法
导入必要的依赖项,包括React的useState、useRef和useEffect hooks,以及一个模块中的CSS样式是很重要的。这个计算器的核心功能允许用户输入关于贷款的具体细节,例如贷款金额、利率和贷款期限。
当用户与应用程序进行交互或更改其输入时,应用程序将自动重新计算如等额分期付款(EMI)、应付利息总额和应还总额等关键数字。要实现这些动态值的更新,使用了使用useState的状态管理技术。此外,使用useRef处理输入参照。
创建NextJS应用的步骤
步骤1:使用以下命令创建一个新的Next.js项目
npx create-next-app loanCalculator
步骤2:切换到项目目录:
cd loanCalculator
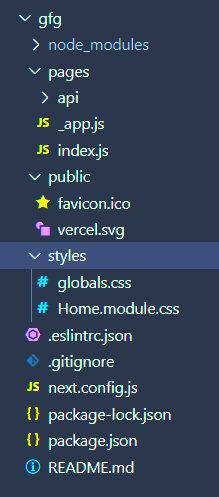
项目结构

示例: 在这个示例中,我们将会看到使用Next.js的贷款计算器应用
- index.js
// Filename: index.js
import { useState, useRef, useEffect } from "react";
import styles from "../styles/Home.module.css";

export default function Home() {
    const [loanAmount, setLoanAmount] = useState(100000);
    const [interestRate, setInterestRate] = useState(9);

    // Default value of 12 months
    const [loanTenure, setLoanTenure] = useState(12);
    const [loanEMI, setLoanEMI] = useState(0);
    const [totalInterest, setTotalInterest] = useState(0);
    const [totalAmount, setTotalAmount] = useState(0);

    const inputRefs = {
        loanAmount: useRef(),
        interestRate: useRef(),
        loanTenure: useRef(),
    };

    useEffect(() => {
        calculateEMI();
    }, []);

    const handleInputChange = (e) => {
        const { name, value } = e.target;
        if (
            name === "loanAmount" ||
            name === "loanTenure" ||
            name === "interestRate"
        ) {
            if (name === "loanTenure") {
                setLoanTenure(parseInt(value) || 0);
            } else if (name === "loanAmount") {
                setLoanAmount(parseFloat(value) || 0);
            } else if (name === "interestRate") {
                setInterestRate(parseFloat(value) || 0);
            }
        }
    };

    const calculateEMI = () => {
        const emi =
            loanAmount *
            (interestRate / 12 / 100) *
            (Math.pow(
                1 + interestRate / 12 / 100,
                loanTenure
            ) /
                (Math.pow(
                    1 + interestRate / 12 / 100,
                    loanTenure
                ) -
                    1));

        setLoanEMI(emi);
        setTotalAmount(Math.round(loanTenure * emi));
        setTotalInterest(
            Math.round(loanTenure * emi) - loanAmount
        );

        updateData();
    };

    const updateData = () => {
        Object.keys(inputRefs).forEach((key) => {
            inputRefs[key].current.value = parseFloat(
                inputRefs[key].current.value || 0
            ).toFixed(2);
        });

        inputRefs.loanAmount.current.value =
            loanAmount.toFixed(2);
        inputRefs.interestRate.current.value =
            interestRate.toFixed(2);
        inputRefs.loanTenure.current.value = loanTenure;
    };

    const handleCalculate = () => {
        calculateEMI();
    };

    return (
        <div className={styles.loanCalculator}>
            <div className={styles.top}>
                <h1 className={styles.heading}>
                    Geeksforgeeks
                </h1>
                <h3>Loan Calculator</h3>
                <form action="#">
                    {Object.entries(inputRefs).map(
                        ([key, ref]) => (
                            <div
                                key={key}
                                className={
                                    styles.subContainer
                                }
                            >
                                <div
                                    className={styles.title}
                                >
                                    {key.replace(
                                        /^\w/,
                                        (c) =>
                                            c.toUpperCase()
                                    )}
                                </div>
                                <input
                                    type="text"
                                    name={key}
                                    defaultValue={
                                        key ===
                                            "interestRate"
                                            ? interestRate
                                            : key ===
                                                "loanTenure"
                                                ? loanTenure
                                                : loanAmount
                                    }
                                    className={styles[key]}
                                    ref={ref}
                                    onChange={
                                        handleInputChange
                                    }
                                />
                            </div>
                        )
                    )}
                </form>
                <button
                    className={styles.btn}
                    onClick={handleCalculate}
                >
                    Calculate
                </button>
            </div>
            <div className={styles.finalResult}>
                <div className={styles.left}>
                    <div className={styles.loanEMI}>
                        <h3>Loan EMI</h3>
                        <div className={styles.value}>
                            {Math.round(loanEMI)}
                        </div>
                    </div>
                    <div className={styles.totalInterest}>
                        <h3>Total Interest Payable</h3>
                        <div className={styles.value}>
                            {totalInterest}
                        </div>
                    </div>
                    <div className={styles.totalAmount}>
                        <h3>Total Amount</h3>
                        <div className={styles.value}>
                            {totalAmount}
                        </div>
                    </div>
                </div>
            </div>
        </div>
    );
}
要为页面添加样式,请打开 Home.module.css 文件,然后粘贴以下代码
CSS
/* styles/Home.module.css */
.loanCalculator {
    font-family: "Roboto", sans-serif;
    width: 80%;
    margin: 0 auto;
    background: #f0f0f0;
    box-shadow: 15px 15px 30px 15px rgba(0, 0, 0, 0.1);
    border-radius: 10px;
    color: #333;
    overflow: hidden;
    margin-top: 5rem;
}

.heading {
    color: #1d8a34;
    font-size: 32px;
    margin: 0;
    padding: 24px;
    text-align: center;
    background: #fff;
}

.top {
    background: #fff;
    padding: 24px;
    text-align: center;
}

.top h3 {
    font-size: 24px;
    margin: 0;
}

.subContainer {
    margin-bottom: 16px;
    text-align: left;
}

.subContainer .title {
    font-size: 18px;
    margin-bottom: 8px;
    color: #333;
}

.loanAmount,
.interestRate,
.loanTenure {
    font-size: 18px;
    padding: 10px;
    border-radius: 8px;
    width: 100%;
    border: 4px solid #ccc;
    outline: none;
}

.loanAmount:focus,
.interestRate:focus,
.loanTenure:focus {
    border-color: #1d8a34;
}

.finalResult {
    background: #fff;
    padding: 24px;
    text-align: center;
}
.finalResult .value::before {
    content: "₹";
    font-size: 24px;
    font-weight: 400;
    margin-right: 6px;
    opacity: 1;
}
.finalResult .left {
    display: flex;
    justify-content: space-around;
}

.left h3 {
    font-size: 20px;
    margin: 0;
    color: #1d8a34;
    padding: 10px;
}

.value {
    font-size: 32px;
    font-weight: 700;
    padding: 12px 24px;
    border-radius: 8px;
    background: #1d8a34;
    color: #fff;
    min-width: 120px;
}

.btn {
    background: #1d8a34;
    color: #fff;
    border: none;
    padding: 15px 20px;
    border-radius: 8px;
    font-size: 18px;
    font-weight: 700;
    cursor: pointer;
    margin: 20px 0;
    transition: background 0.3s;
}

.btn:hover {
    background: #155d27;
}
步骤3: 要运行next.js应用程序,请使用以下命令,然后转到此URL:http://localhost:3000
npm run dev
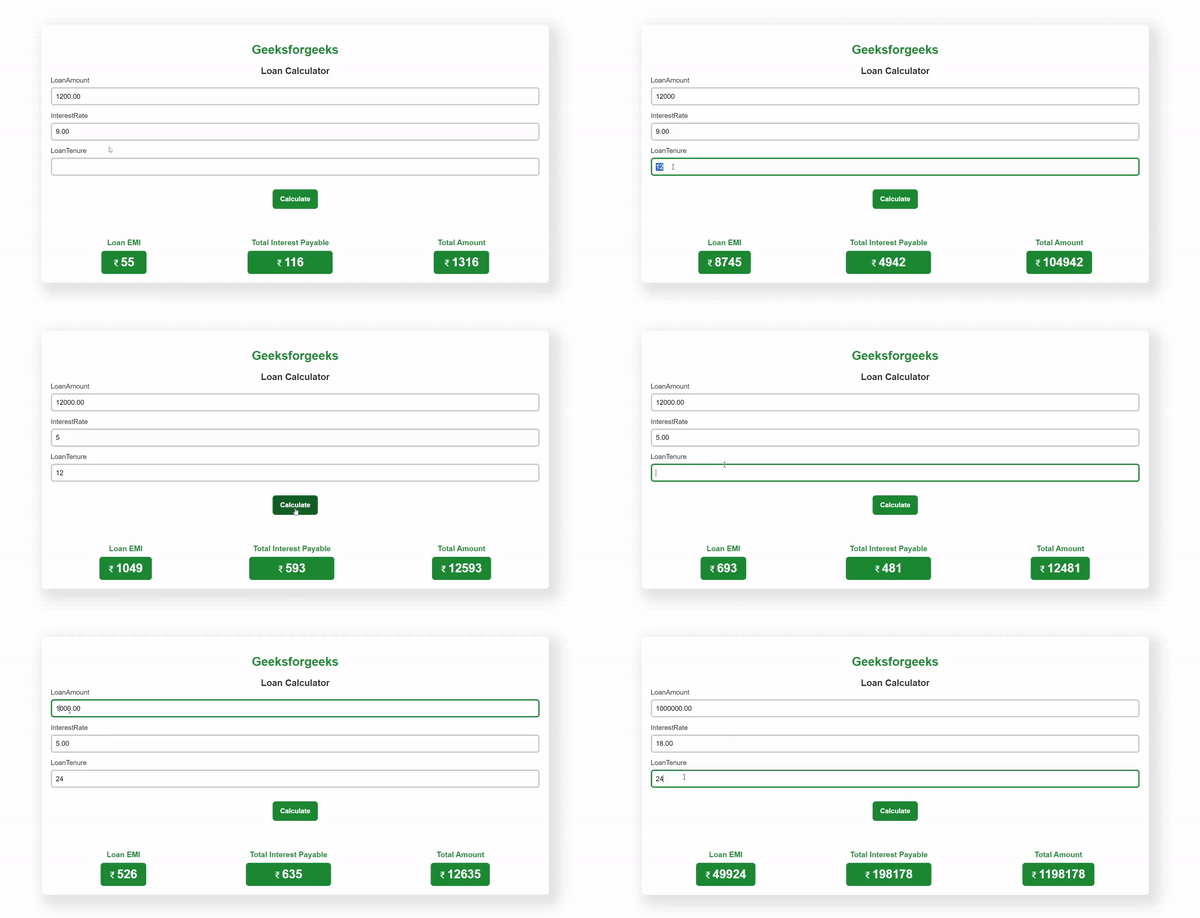
输出:

 极客教程
极客教程