如何通过NodeJS使用Web3部署智能合约
本文重点讨论如何通过NodeJS使用web3部署智能合约。本文将涵盖以下主题:
- web3js模块介绍
- 如何使用web3js生成ABI和字节码
- 使用web3js进行智能合约的编译和部署
软件要求:
- Nodejs
- Ganache
- 文本编辑器 – VS Code
web3.js模块介绍
web3.js是连接我们实时世界应用程序与智能合约的接口。

当我们想要将部署在区块链上的智能合约与任何网站连接时,web3.js充当中介,使它们可以相互交互。简单来说,在分散式应用程序中,我们通过一个名为web3.js的库将前端与后端的智能合约连接起来。
现在让我们开始进行开发部分。
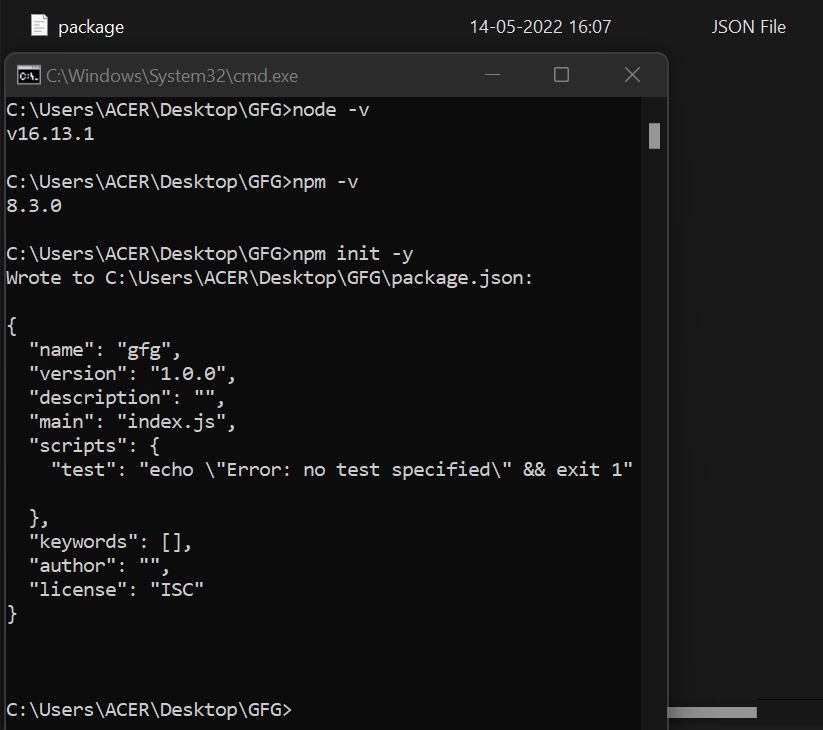
步骤1: 创建一个您喜欢的文件夹,并在其中使用以下命令添加一个package.json文件:npm init -y
请确保您已经安装了node,您可以使用以下命令验证:
node -v
npm -v
步骤2:
这个 package.json 文件将包含所有安装的包,当前它还没有包含任何包。现在,让我们通过使用命令将 web3.js 添加到我们的 package.json 文件中 –
npm install –save web3
安装需要一些时间,请耐心等待。现在,您可能会注意到您的文件夹和 package.json 文件发生了一些变化。
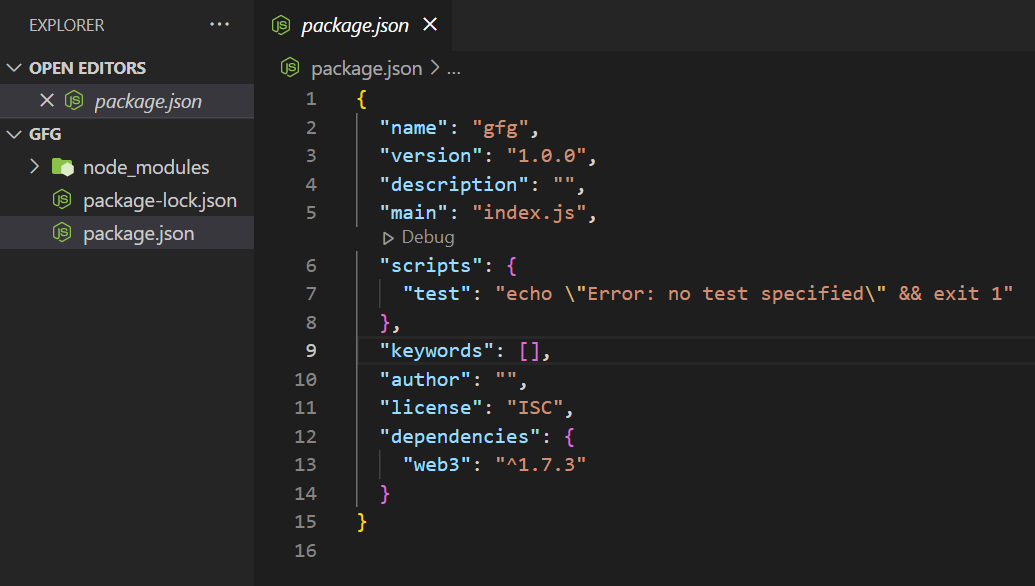
步骤3: 可以注意到,在创建的 node modules 文件夹中添加了 web3 的依赖项。为了查看 web3 提供的所有功能,让我们转到 node 终端。可以使用以下命令来访问 node 终端: node 。

步骤4: 导入 web3 至终端,以便在控制台上与其进行交互。输入以下命令:
> let Web3 = require(“web3”);
// 变量名以 “W” 开头,因为我们将在此处创建一个 web3 的类。
这将输出 undefined,但之后输入命令:
> Web3
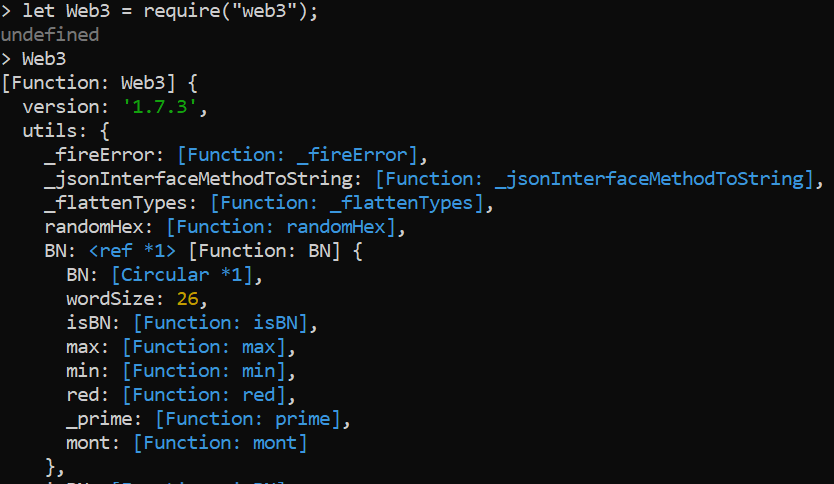
在输入Web3命令后,终端中会出现一堆代码,这就是web3库包含的内容。
与Ganache交互的web3.js
步骤1: 创建web3对象并连接到Ganache。在此之前,请检查系统中是否已安装Ganache。如果Ganache已安装,则会看到Ganache提供的HTTP URL,例如:
HTTP://127.0.0.1:7545
> let web3 = new Web3(new Web3.providers.HttpProvider(“HTTP://127.0.0.1:7545”));
步骤2: 这个命令将输出undefined,但之后输入以下命令:
> web3
步骤3: 现在可以通过web3控制Ganache。现在可以使用许多功能,例如获取任何Ganache账户的余额详情。
> web3.eth.getBalance(“在此处粘贴任何Ganache地址”).then(function(value) {console.log(web3.utils.fromWei(value,”ether”));})

可以在Ganache中验证输入的特定地址的输出余额。
使用web3.js与智能合约进行交互并编译智能合约
步骤1: 在文件夹中创建一个Solidity文件和一个JavaScript文件。在这里,Solidity文件被命名为 initial.sol ,而JavaScript文件被命名为 initial.js。 为了演示目的,创建了一个简单的getter和setter Solidity智能合约。将智能合约粘贴到你的Solidity文件中。
// SPDX-License-Identifier: GPL-3.0
pragma solidity >=0.7.0 <0.9.0;

contract initial{

    string public message;

    constructor(){
        message="Hello World";
    }

    function setMessage(string memory _newMessage) public{
        message=_newMessage;
    }

    function getMessage() public view returns(string memory){
        return message;
    }
}

步骤2: 在Remix IDE中,智能合约成功编译后会生成ABI和字节码。
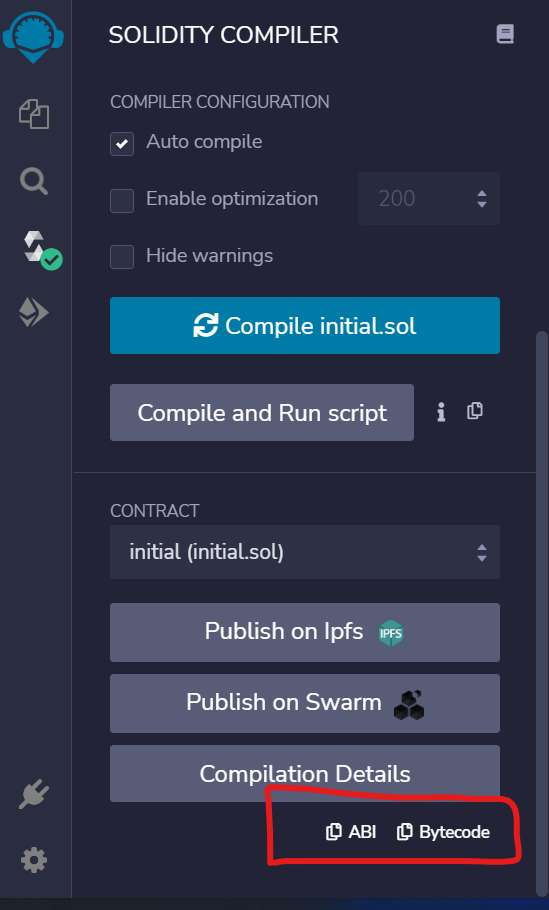
步骤3: 为了在代码中获取相同的ABI和字节码,需要首先安装 solc 编译器和一个文件阅读器, fs ,使用以下命令:
npm install solc
npm install fs
步骤4: 安装solc和fs之后,打开JavaScript文件initial.js并使用它们。
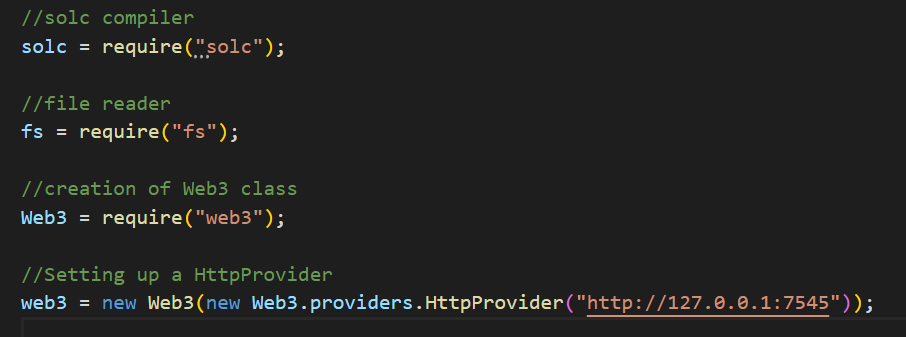
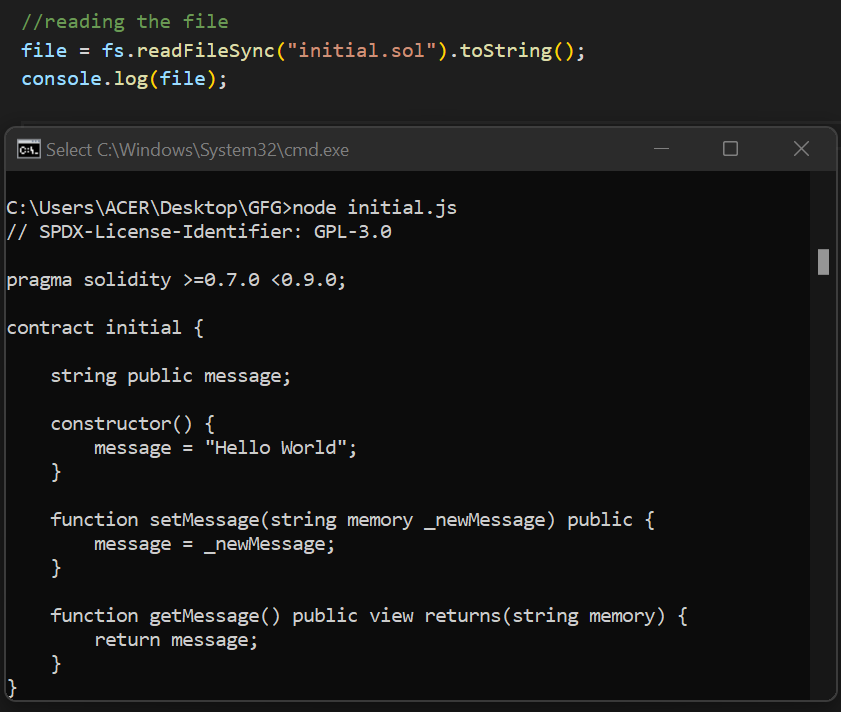
步骤5: 导入solc、fs和web3,并将Ganache连接到web3.js。现在,我们可以使用下面的命令来读取文件的内容:
node initial.js
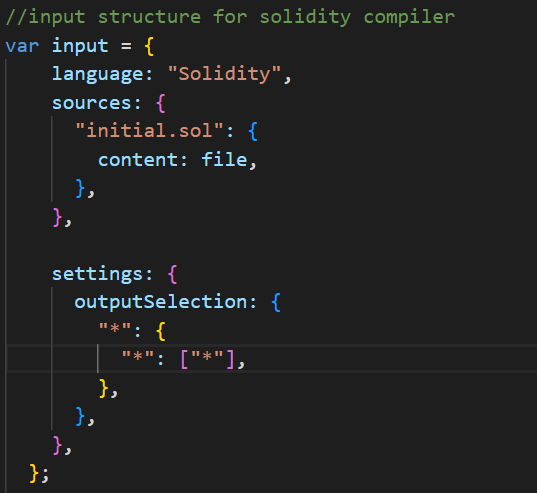
步骤6: 为了给solc编译器提供输入,需要有适当的输入结构:
步骤7: 将文件输入给solc编译器后,编译器会给我们提供输出结果,这个输出结果需要转换成JSON格式,以便从中获取ABI和Bytecode。

以下是上述方法的JavaScript代码:
// solc compiler
solc = require("solc");

// file reader
fs = require("fs");

// Creation of Web3 class
Web3 = require("web3");

// Setting up a HttpProvider
web3 = new Web3(new Web3.providers.HttpProvider("http://127.0.0.1:7545"));

// Reading the file
file = fs.readFileSync("initial.sol").toString();
console.log(file);

// Input structure for solidity compiler
var input = {
    language: "Solidity",
    sources: {
      "initial.sol": {
        content: file,
      },
    },

    settings: {
      outputSelection: {
        "*": {
          "*": ["*"],
        },
      },
    },
  };

  var output = JSON.parse(solc.compile(JSON.stringify(input)));
  console.log("Result : ", output);

  ABI = output.contracts["initial.sol"]["initial"].abi;
  bytecode = output.contracts["initial.sol"]["initial"].evm.bytecode.object;
  console.log("Bytecode: ", bytecode);
  console.log("ABI: ", ABI);
步骤8: 现在我们将ABI和Bytecode作为输出:
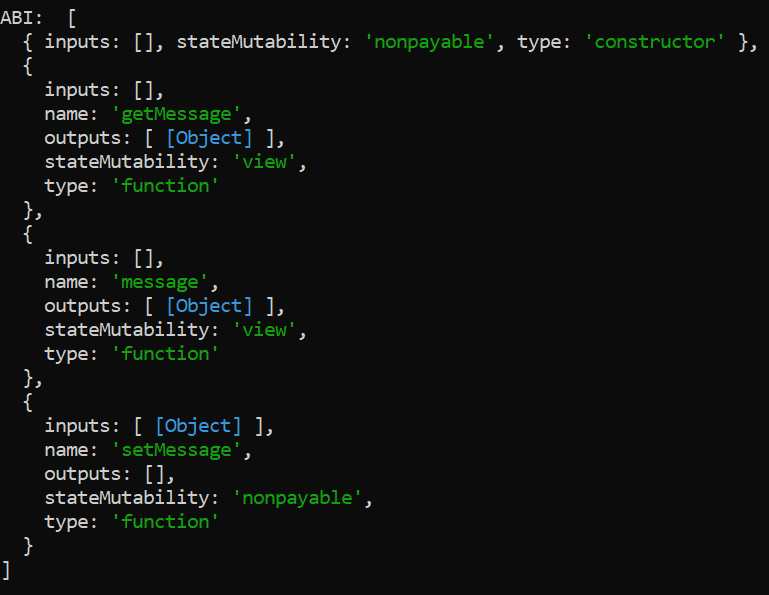
现在我们已成功编译了智能合约,现在让我们部署智能合约。
4. 部署智能合约
步骤1: 为了部署智能合约,需要一个合约类实例。让我们显示所有 Ganache 的账户。
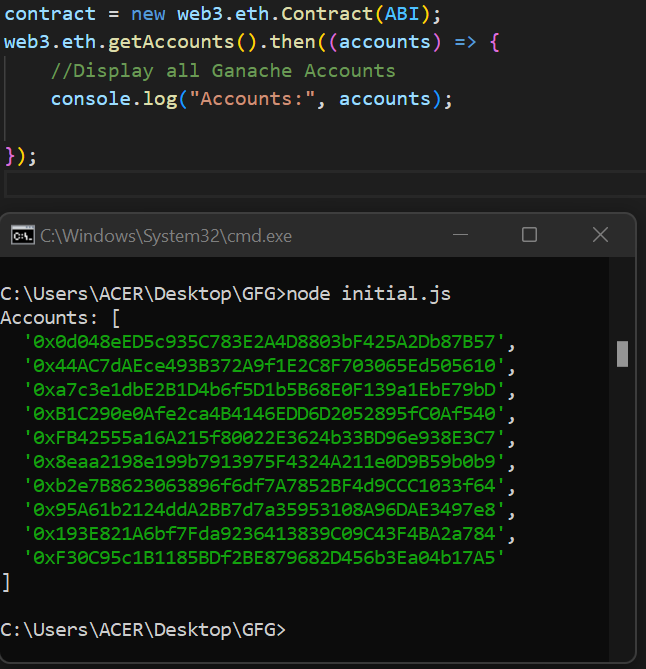
步骤2: 部署智能合约时,请选择一个用于部署智能合约的账户。在此演示中,选择第一个账户地址。输出
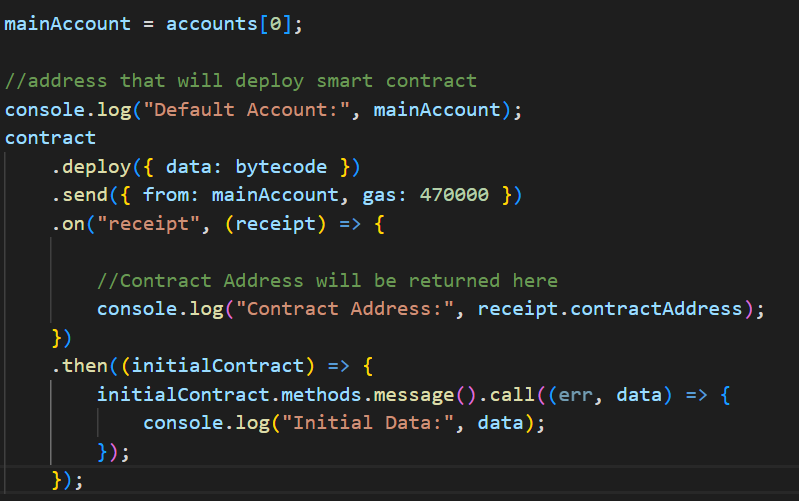
以下是实现以上方法的JavaScript代码:
// solc compiler
solc = require("solc");

// file reader
fs = require("fs");

// Creation of Web3 class
Web3 = require("web3");

// Setting up a HttpProvider
web3 = new Web3(new Web3.providers.HttpProvider("http://127.0.0.1:7545"));

// Reading the file
file = fs.readFileSync("initial.sol").toString();

// console.log(file);

// input structure for solidity compiler
var input = {
    language: "Solidity",
    sources: {
        "initial.sol": {
            content: file,
        },
    },

    settings: {
        outputSelection: {
            "*": {
                "*": ["*"],
            },
        },
    },
};

var output = JSON.parse(solc.compile(JSON.stringify(input)));
// console.log("Result : ", output);

ABI = output.contracts["initial.sol"]["initial"].abi;
bytecode = output.contracts["initial.sol"]["initial"].evm.bytecode.object;
// console.log("Bytecode: ", bytecode);
// console.log("ABI: ", ABI);


contract = new web3.eth.Contract(ABI);
web3.eth.getAccounts().then((accounts) => {
    // Display all Ganache Accounts
    console.log("Accounts:", accounts);

    mainAccount = accounts[0];

    // address that will deploy smart contract
    console.log("Default Account:", mainAccount);
    contract
        .deploy({ data: bytecode })
        .send({ from: mainAccount, gas: 470000 })
        .on("receipt", (receipt) => {

            // Contract Address will be returned here
            console.log("Contract Address:", receipt.contractAddress);
        })
        .then((initialContract) => {
            initialContract.methods.message().call((err, data) => {
                console.log("Initial Data:", data);
            });
        });
});
输出:

输出显示合约地址,这意味着合约已经成功部署。初始数据也被打印出来,设置为智能合约中的Hello World。
然而,现在有像Hardhat和Truffle这样的工具,所以没有必要从零开始编写和执行所有这些操作。
 极客教程
极客教程