如何启动tensorflow Docker jupyter笔记本
简介
Jupyter笔记本对于编写、测试和调试代码非常有用。TensorFlow是一个机器学习框架,可以与Jupyter笔记本一起使用。
在这篇文章中,我们将探讨如何使用Docker来启动TensorFlow Jupyter笔记本,这将使我们能够利用这两种工具的优势。
先决条件
在开始之前,你将需要在你的机器上安装Docker和Docker Compose。你可以使用以下命令检查它是否已经安装
$ docker --version
$ docker-compose --version
https://docs.docker.com/get-docker/.
此外,如果你想使用TensorFlow,你必须有一个Jupyter笔记本文件。通过访问Jupyter主页并选择 “新建”,如果你还没有一个Jupyter笔记本,你可以创建一个新的Jupyter笔记本。
方法
你可以利用Docker来启动TensorFlow Jupyter笔记本,有很多不同的方式。
这就是我们将在此讨论的三种常见方式–
- 使用Docker Pull命令
-
使用自定义Docker镜像
让我们通过一些例子详细探讨这三种方法,以巩固我们的理解。
使用Docker Pull命令
docker pull命令用于从注册中心下载一个Docker镜像。当你想启动一个TensorFlow Docker Jupyter笔记本时,这可能很有用,因为它允许你拉一个已经安装了TensorFlow和Jupyter的预建镜像,而不是自己建立镜像。
示例
下面是一个例子,说明我们如何使用Docker Pull命令来启动一个带有TensorFlow的Jupyter笔记本服务器。
第1步
$ docker pull tensorflow/tensorflow:latest-jupyter
输出
latest-jupyter: Pulling from tensorflow/tensorflow
eaead16dc43b: Pulling fs layer
83bb66f4018d: Pulling fs layer
a9d243755566: Pulling fs layer
38d8f03945ed: Waiting
0e62e78ef96b: Pulling fs layer
311604e9ab28: Waiting
584c5149ce07: Waiting
3b5c5b94152b: Waiting
bc4c0cbbecee: Pulling fs layer
e54d9b2b9c14: Waiting
744251fdb607: Pull complete
4b8f13a1718e: Pull complete
576cd80cf2ef: Pull complete
ab9e5d943e8a: Pull complete
948afa4f3678: Pull complete
2881ce411453: Pull complete
3b726e62f5fc: Pull complete
2f02f34d5aa5: Pull complete
b294ff4151bd: Pull complete
48f3a326b505: Pull complete
72ab8332d21f: Pull complete
d6381c50d9a3: Pull complete
77237dfb2f16: Pull complete
Digest: sha256:553be1359899095780cfcfc5bf1c26bca487a606f07a37ba31e1808a98072785
Status: Downloaded newer image for tensorflow/tensorflow:latest-jupyter
docker.io/tensorflow/tensorflow:latest-jupyter
第2步 – 通过使用以下命令运行TensorFlow Jupyter笔记本Docker容器—-。
$ docker run -it -p 8888:8888 tensorflow/tensorflow:latest-jupyter
该命令将在Docker容器中启动TensorFlow Jupyter笔记本,并暴露8888端口。
输出
docker run -it -p 8888:8888 tensorflow/tensorflow:latest-jupyter
[I 12:23:48.212 NotebookApp] Writing notebook server cookie secret to /root/.local/share/jupyter/runtime/notebook_cookie_secret
jupyter_http_over_ws extension initialized. Listening on /http_over_websocket
[I 12:23:50.824 NotebookApp] Serving notebooks from local directory: /tf
[I 12:23:50.825 NotebookApp] Jupyter Notebook 6.5.2 is running at:
[I 12:23:50.825 NotebookApp] http://2f07aa29bf45:8888/?token=d2b59435738257715a8a74b73d6c6f13e305008d4451c937
[I 12:23:50.825 NotebookApp] or http://127.0.0.1:8888/?token=d2b59435738257715a8a74b73d6c6f13e305008d4451c937
[I 12:23:50.826 NotebookApp] Use Control-C to stop this server and shut down all kernels (twice to skip confirmation).
[C 12:23:50.845 NotebookApp]
To access the notebook, open this file in a browser:
file:///root/.local/share/jupyter/runtime/nbserver-1-open.html
Or copy and paste one of these URLs:
http://2f07aa29bf45:8888/?token=d2b59435738257715a8a74b73d6c6f13e305008d4451c937
or http://127.0.0.1:8888/?token=d2b59435738257715a8a74b73d6c6f13e305008d4451c937
[I 12:24:09.148 NotebookApp] 302 GET / (172.17.0.1) 3.370000ms
[I 12:24:09.212 NotebookApp] 302 GET /tree? (172.17.0.1) 2.230000ms
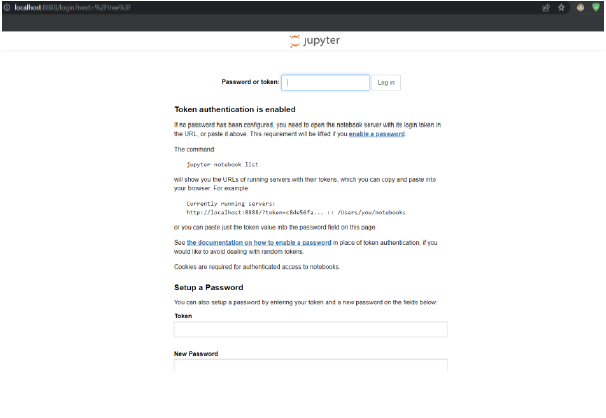
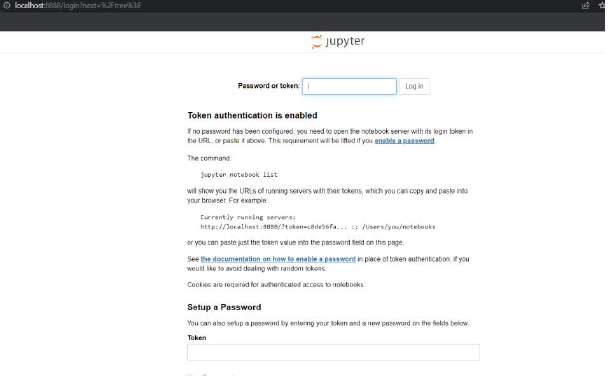
第3步 – 一旦TensorFlow Jupyter笔记本启动并运行,你可以在你的网络浏览器中访问 http://localhost:8888 –访问它。

第4步 – 要停止TensorFlow Jupyter笔记本,在运行Docker容器的终端窗口中按 “Ctrl+C”。
输出
#### ^C[I 12:42:41.867 NotebookApp] interrupted


Serving notebooks from local directory: /tf
0 active kernels
Jupyter Notebook 6.5.2 is running at:
http://2f07aa29bf45:8888/?token=d2b59435738257715a8a74b73d6c6f13e305008d4451c937
or http://127.0.0.1:8888/?token=d2b59435738257715a8a74b73d6c6f13e305008d4451c937
Shutdown this notebook server (y/[n])? y
[C 12:42:43.742 NotebookApp] Shutdown confirmed
[I 12:42:43.766 NotebookApp] Shutting down 0 kernels
[I 12:42:43.804 NotebookApp] Shutting down 0 terminals
第5步 – 要再次启动TensorFlow Jupyter笔记本,你可以使用和以前一样的Docker运行命令–
$ docker run -it -p 8888:8888 tensorflow/tensorflow:latest-jupyter
使用自定义Docker镜像
你可以制作你自己的Docker镜像来为你的TensorFlow Jupyter笔记本定制环境。你必须写一个Docker文件,详细说明基本镜像和任何你希望包括的额外依赖,以实现这一目的。
要创建一个自定义的Docker镜像,你需要创建一个Docker文件来定义你的镜像。
示例
下面是一个安装TensorFlow和Jupyter的Docker文件的例子。
第1步 – 为你的项目创建一个新的目录,并导航到它。
第2步 – 在项目目录下创建一个名为 “Dockerfile “的文件,内容如下
FROM python:3.8
RUN pip install tensorflow
RUN pip install jupyter
这些命令用于从Python 3.8版本安装TensorFlow和Jupyter。
第3步
$ docker build -t mytensorflow .
构建这个Tensorflow镜像需要花费一些时间。其结果将是一个名为 “mytensorflow “的图像。
输出
[+] Building 465.6s (7/7) FINISHED
=> [internal] load build definition from Dockerfile 0.1s
=> => transferring dockerfile: 107B 0.0s
=> [internal] load .dockerignore 0.0s
=> => transferring context: 2B 0.0s
=> [internal] load metadata for docker.io/library/python:3.8 2.9s
=> CACHED [1/3] FROM docker.io/library/python:3.8@sha256:3a519327ab069a4e356a8aa279e80b7ef6270e17c5df1493dd0a5b2817 0.0s
=> [2/3] RUN pip install tensorflow 311.0s
=> [3/3] RUN pip install jupyter 75.9s
=> exporting to image 75.4s
=> => exporting layers 75.3s
=> => writing image sha256:14ff4caa7e8b3d2fef9e2a911839f682f720873bd35b8402efda52e8c8ff754f 0.0s
=> => naming to docker.io/library/mytensorflow 0.0s
使用 “docker扫描 “对图像进行Snyk测试,以发现漏洞并学习如何修复它们。
第4步
$ docker run -it -p 8888:8888 mytensorflow
如果这个命令似乎不起作用,请尝试下面的命令 —
$ docker run -it -p 8888:8888 tensorflow/tensorflow:latest-jupyter
第5步 – 如果前一个命令奏效,你应该看到终端中打印出一个链接,如果是另一个命令,使用这个链接在新窗口中启动TensorFlow Jupyter笔记本——。
<http://localhost:8888>

结论
在这篇文章中,我们探讨了如何启动一个TensorFlow Docker Jupyter笔记本。我们看了三种不同的方法来启动TensorFlow Jupyter笔记本,包括使用TensorFlow Docker镜像,创建一个自定义的Docker镜像,以及使用Docker Compose。使用这些方法中的任何一种,你都可以轻松地设置一个TensorFlow Jupyter笔记本,并开始在Docker容器中使用TensorFlow工作。
 极客教程
极客教程