PyQt5 QCalendarWidget 设置其布局
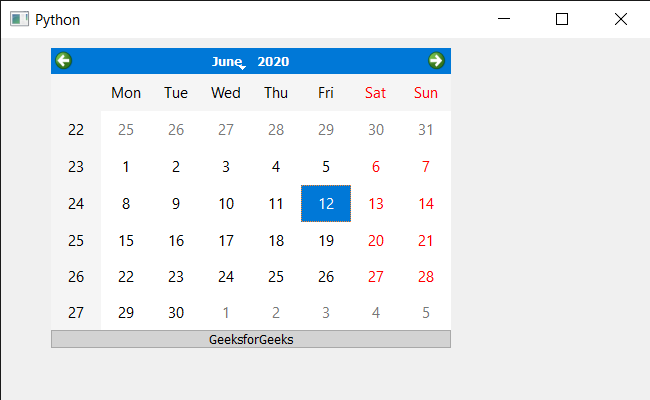
在这篇文章中,我们将看到如何设置QCalendarWidget的布局。为了做到这一点,我们使用setLayout方法,如果已经有一个布局管理器安装在日历上,QWidget将不会让我们安装另一个。我们必须首先删除或更新现有的布局管理器(由layout()返回),然后我们才能用新的布局调用setLayout()。
为了做到这一点,我们将使用QCalendarWidget对象的setLayout方法。
语法:calendar.setLayout(layout)
参数: 它需要QLayout对象作为参数
返回: 它返回无
实现步骤:
1.创建一个主窗口
2.创建一个日历部件并为其设置几何图形
3.获取日历的布局
4.创建一个标签并设置其属性
5.使用addWidget方法将这个标签添加到布局中
6.将这个布局设置到日历上
下面是实现的过程
# importing libraries
from PyQt5.QtWidgets import *
from PyQt5 import QtCore, QtGui
from PyQt5.QtGui import *
from PyQt5.QtCore import *
import sys


class Window(QMainWindow):

    def __init__(self):
        super().__init__()

        # setting title
        self.setWindowTitle("Python ")

        # setting geometry
        self.setGeometry(100, 100, 650, 400)

        # calling method
        self.UiComponents()

        # showing all the widgets
        self.show()

    # method for components
    def UiComponents(self):

        # creating a QCalendarWidget object
        self.calendar = QCalendarWidget(self)

        # setting geometry to the calendar
        self.calendar.setGeometry(50, 10, 400, 300)

        # setting cursor
        self.calendar.setCursor(Qt.PointingHandCursor)

        # getting the current lay out
        layout = self.calendar.layout()

        # creating a label
        label = QLabel("GeeksforGeeks", self)

        # setting alignment
        label.setAlignment(Qt.AlignCenter)

        # setting style sheet to the label
        label.setStyleSheet("QLabel"
                            "{"
                            "border : 1px solid darkgrey;"
                            "background : lightgrey;"
                            "}")

        # adding label to the layout
        layout.addWidget(label)

        # setting layout back to calendar
        self.calendar.setLayout(layout)


# create pyqt5 app
App = QApplication(sys.argv)

# create the instance of our Window
window = Window()

# start the app
sys.exit(App.exec())
输出。

 极客教程
极客教程